 |
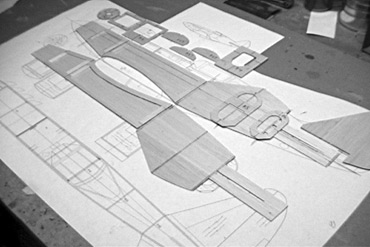
| Fuselage construction begins by preparing the 1/16" thick fuselage side panels and fabricating formers. Draw the location
of the formers and fuselage centerline on the inside of each fuselage panel. Glue 1/16" thick fuselage "doublers" to each
fuselage side panel as shown. Be sure to make a left and right half. |
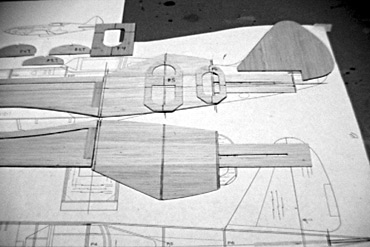 |
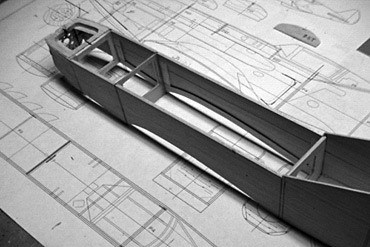
| Detail photo showing the aft part of the fuselage sides and formers F5 and F6 which are 1/16" balsa. |
 |
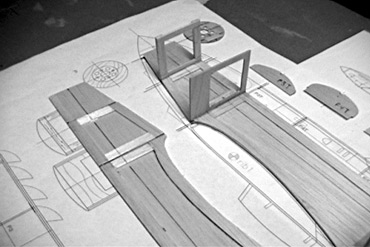
| Another detail photo showing the forward portion of the fuselage sides. Formers F1, F2, F3, F4 and top
formers F3T, F4T and F5T are shown above the right fuselage side. |
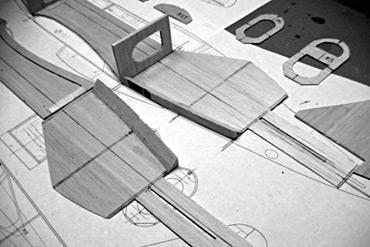 |
| Glue F2, F3 F4 to the right fuselage side only. A 1/2" triangular stick is glued to the fuselage side
between formers F4 and F6. Cut slits in the triangular stock to facilitate bending to bottom fuselage side curve. |
 |
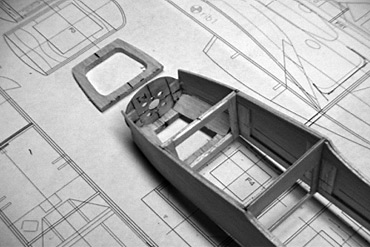
| Close up view the for forward fuselage side panel with formers F2 and F3 glued in place. |
 |
| Left fuselage side has been glued to formers F2, F3 and the firewall F1 has been installed. A 1/4" thick
balsa alignment piece has been glued between the firewall F1 and F2. |
 |
| Bottom view of forward fuselage. 1/2" triangular stock has been added to fascilitate shaping the nose.
A second 1/4" balsa alignment peice is ready to glue between the firewall and F2 flush with the fuselage sides. |